A guide to Spring Boot Admin Server. Learn to create a centralised Admin Server to monitor and manage your other Spring Boot Services.
Tutorial Contents
What is Spring Boot Admin Server?
Actuators help to manage and monitor individual Spring Boot services. However, using actuators for monitoring and managing large number of services is not easy. Because each service has its own actuator endpoint. Which makes it difficult to inspect them individually. Also, the actuator endpoints do not provide a visual representation of the applications health.
In other words, actuators are great at inspecting individual Spring Boot applications, but when you have ‘n’ number of Spring Boot Services, the actuators are not easy.
The Admin Server, exactly solves this problem. it is a server which provides UI based management and monitoring console for various Spring Boot Applications.
Various Spring Boot applications (called as clients) register their actuator endpoints with the Admin Server and admin server uses HTTP interface to monitor these services.
Before you proceed, understand Spring Boot Actuator basics – Spring Boot Actuator.
Learn more:
Start Admin Server
The Admin Server is simple Spring Boot Project, with absolutely no code. As stated earlier, it is a central monitoring application for all of your spring boot services.
Firstly, create a new Spring Boot Application (Empty). Then, add below entries to gradle.
gradle dependency
implementation 'de.codecentric:spring-boot-admin-starter-server:{server.version}'
implementation 'de.codecentric:spring-boot-admin-server-ui:{ui.version}'Code language: Gradle (gradle)
Or, maven dependency
<dependency>
  <groupId>de.codecentric</groupId>
  <artifactId>spring-boot-admin-starter-server</artifactId>
  <version>{server.version}</version>
</dependency>
<dependency>
  <groupId>de.codecentric</groupId>
  <artifactId>spring-boot-admin-server-ui</artifactId>
  <version>{ui.version}</version>
</dependency>Code language: HTML, XML (xml)
Finally you need enable admin server with @EnableAdminServer annotation.
Application.java
@EnableAdminServer
@SpringBootApplication
public class Application {
    public static void main(String[] args) {
        SpringApplication.run(Application.class, args);
    }
}Code language: Java (java)
Now, open the browser and run the application on default port http://localhost:8080. You should see the Server UI looking for services to monitor.

At this point you, have got your Admin Server up and running.
Admin Server Clients
The Clients are any normal Spring Boot Actuator enabled services which are monitored by Admin Server. For example, we have a Songs Service with actuator already enabled. Now, to the Songs Service need to register itself with the admin server we started above. To do this, Songs Service needs admin server client dependency.
gradle dependency
implementation 'de.codecentric:spring-boot-admin-starter-client:{client.version}'Code language: Gradle (gradle)Or, maven dependency
<dependency>
  <groupId>de.codecentric</groupId>
  <artifactId>spring-boot-admin-starter-client</artifactId>
  <version>{client.version}</version>
</dependency>Code language: HTML, XML (xml)
After this, you need to enable the actuator endpoints and also provide admin server url.
application.yaml
management:
  endpoints:
    web:
      exposure:
        include: '*'
  endpoint:
    health:
      show-details: always
spring:
  boot:
    admin:
      client:
        url: [http://localhost:8080]
  application:
    name: Songs ServiceCode language: YAML (yaml)
The Songs Service is now ready to launch.
In order to test, we want to run two instances of the Songs Service. Thus, build the project using maven or gradle and run the same JAR twice on different ports – 8081, and 8082.
Learn more about Spring Boot changing default server port – Changing report in Spring Boot.
java -jar -Dserver.port=8081 songs-service.jar

// in separate window
java -jar -Dserver.port=8082 songs-service.jar
Code language: JavaScript (javascript)
Monitor on Admin Server
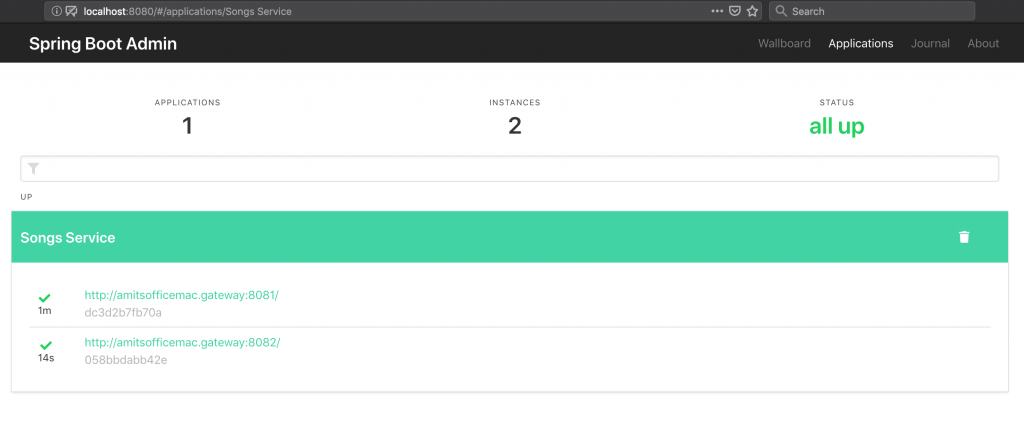
Now, go back to the Admin Server Console and you should see Songs Service with 2 instances.

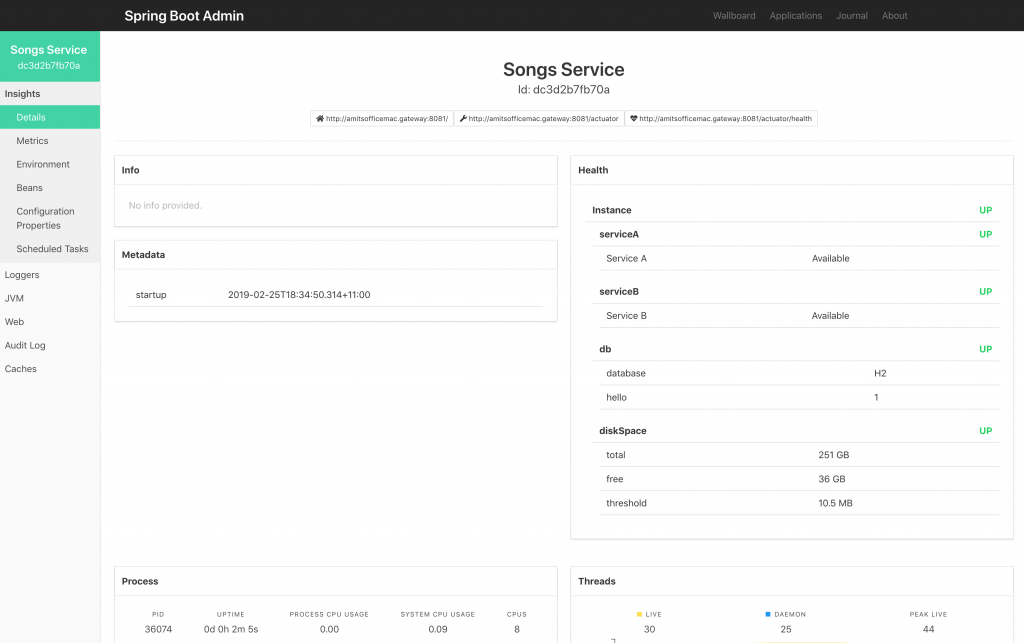
Now, click on either of the instances to see details.

You will have to actually, try and play around to see the depth of details the admin server provides.
Admin Server Notifications
Till now, you have started a Spring Boot Admin UI and also registered other Spring Boot Services as Clients. Finally, it is time to see how Spring Boot Admin is capable of sending notifications with zero code.
Spring Boot Admin has in built support for below services.
- Pager Duty
- OpsGenie
- HipChat
- Let’s Chat
- Microsoft Teams
- Telegram
- Discord
For example, we will integrate Slack and test if the Admin Server correctly send notification about service is DOWN.
For that, you just need to let admin server know about the slack channel.
spring.boot.admin.notify.slack.webhook-url=https://hooks.slack.com/services/<Channel_WebHook>
spring.boot.admin.notify.slack.channel=testCode language: Properties (properties)
Now, we restart the admin server and simply shutdown one of our client service. We receive a slack notification correctly.

Spring Boot Admin Server Security
The admin server exposes sensitive information about the clients. Therefore, it is very important to put access restrictions over it. We have already covered Spring Boot Actuator Endpoint Security. However, securing the admin server is also essential. We will cover the admin server security in three steps described below.
Secure Admin Server
First, you need to add a starter dependency of Spring Security and dependency of admin server login module.
Gradle dependency
implementation 'de.codecentric:spring-boot-admin-server-ui-login:{ui.login.version}'
implementation 'org.springframework.boot:spring-boot-starter-security'Code language: Gradle (gradle)
Or, Maven dependency
<dependency>
  <groupId>de.codecentric</groupId>
  <artifactId>spring-boot-admin-server-ui-login</artifactId>
  <version>{ui.login.version}</version>
</dependency>
<dependency>
  <groupId>org.springframework.boot</groupId>
  <artifactId>spring-boot-starter-security</artifactId>
</dependency>Code language: HTML, XML (xml)
Then, add Spring Security Configuration to secure the application.
@Configuration
public class SecurityConfiguration extends WebSecurityConfigurerAdapter {
    private final String adminContextPath;

    public SecurityConfiguration(AdminServerProperties adminServerProperties) {
        this.adminContextPath = adminServerProperties.getContextPath();
    }

    @Override
    protected void configure(HttpSecurity http) throws Exception {
        SavedRequestAwareAuthenticationSuccessHandler successHandler = new SavedRequestAwareAuthenticationSuccessHandler();
        successHandler.setTargetUrlParameter("redirectTo");
        successHandler.setDefaultTargetUrl(adminContextPath + "/");

        http
            .authorizeRequests().antMatchers(adminContextPath + "/assets/**").permitAll()
            .antMatchers(adminContextPath + "/login").permitAll()
            .anyRequest().authenticated()
            .and().formLogin().loginPage(adminContextPath + "/login").successHandler(successHandler)
            .and().logout().logoutUrl(adminContextPath + "/logout")
            .and().httpBasic()
            .and().csrf().csrfTokenRepository(CookieCsrfTokenRepository.withHttpOnlyFalse())
            .ignoringAntMatchers(adminContextPath + "/instances", adminContextPath + "/actuator/**");
    }
}Code language: Java (java)
Now, the admin server is secured. However, you need to define a username and password.
spring:
  security:
    user:
      name: "admin"
      password: "admin123"Code language: YAML (yaml)
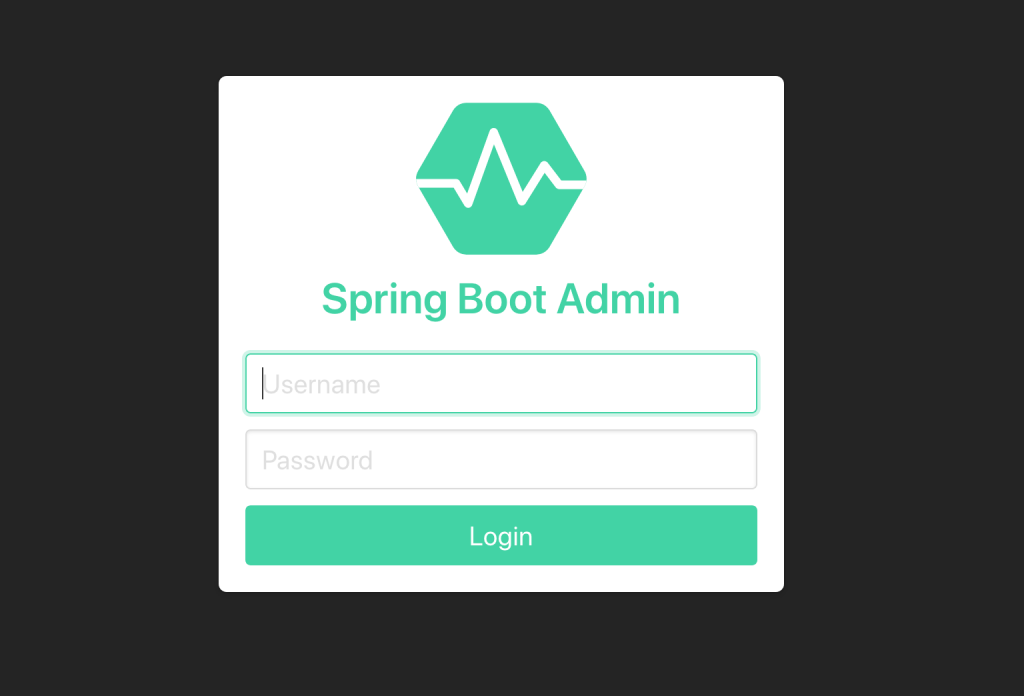
Now try accessing the Admin Server in browser, and you should be prompted for credentials. Provide the above username/password combination to log in.

Admin Server Credentials in Client Application
After this, you should notice that the client application is unable to register with the admin server. Because, admin server is now password protected. Therefore, you need to add the admin server credentials in client’s properties configurations.
spring:
  boot:
    admin:
      client:
        url: [http://localhost:8080]
        username: "admin"
        password: "admin123"Code language: YAML (yaml)
After this, your should see the client is able to register with the Admin Server.
Admin Server to access Client’s Secured Endpoints
Consider, the client has secured actuator endpoints. Because of which, the admin server will only be able to access “/health” and “/info” endpoints from the client. You need to make admin server to pass clients credentials while accessing client’s secured endpoints.
For that, the clients, while registering with admin server, also need to specify username/password to access their own actuator endpoints. This is done as below.
spring:
  boot:
    admin:
      client:
        instance:
          metadata:
            user.name: client
            user.password: clientPasswordCode language: YAML (yaml)
Finally, you have got everything secured. The Admin Server is secured and the Client endpoints are secured too. Also, both of them are aware of the credentials to interact with each other.
Summary
This tutorial covered an in-depth introduction to Spring Boot Admin Server. Spring Boot admin server helps monitor and manage different spring boot services. Most importantly, the Spring Boot Admin Server requires zero code and minimal configurations.
We covered setting up a Spring Boot Admin Server and accessing its user interface. Then, we created a client project and registered it with the admin server. Then we monitored the service from the admin server user interface. Also, we demonstrated how to the Admin server can notify issues to popular notification channels like slack.
Lastly, we also learnt How to secure the Spring Boot Admin Server using Spring Security.
The source code examples used in this project can be found on Github Repository: admin-server-source-code and client-source-code.
